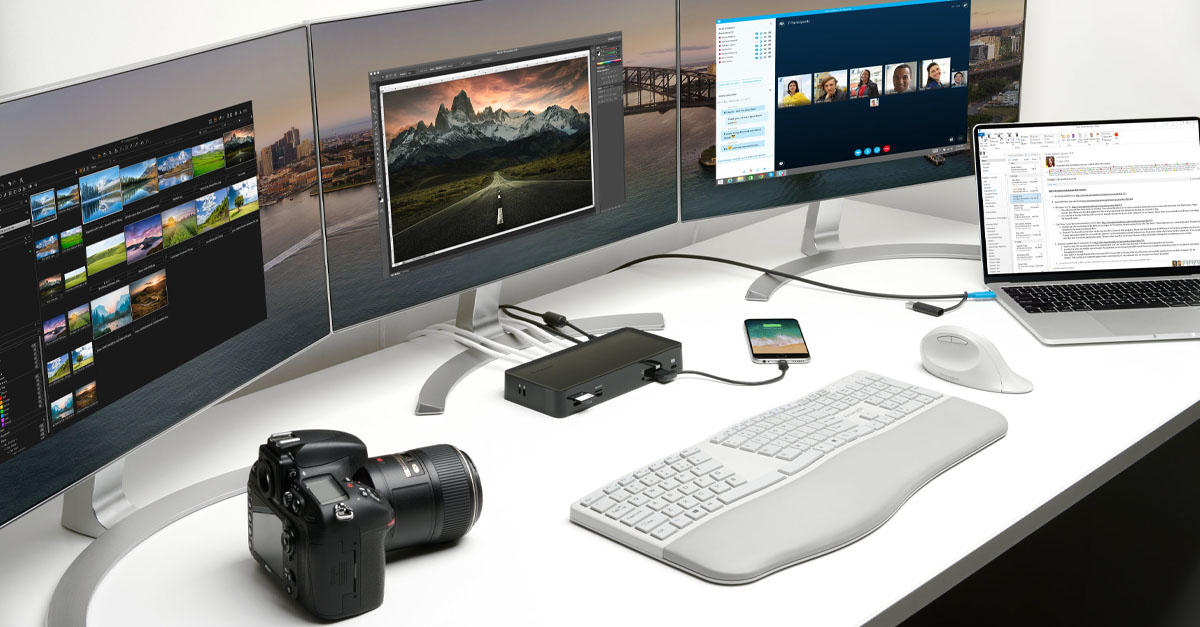
Are you tired of constantly switching between applications on your computer? Using two monitors can be a game-changer for your productivity and overall workflow. With dual monitors, you can multitask with ease, compare documents side-by-side, and take your gaming experience to the next level. How to connect two monitors to one computer This guide will walk you through the entire process of setting up a dual monitor configuration, from understanding your hardware to optimizing your display settings. Get ready to take your work and entertainment to the next level with dual monitors.
Table of Contents
II. Understanding Your Hardware
Are you tired of constantly switching between applications on your computer? Using two monitors can be a game-changer for your productivity and overall workflow. With dual monitors, you can multitask with ease, compare documents side-by-side, and take your gaming experience to the next level. This guide will walk you through the entire process of setting up a dual monitor configuration, from understanding your hardware to optimizing your display settings. Get ready to take your work and entertainment to the next level with dual monitors.
Types of Ports:
Let me tell you about the different types of ports, starting with the HDMI port. This port is essential for modern monitors and TVs as it can carry both video and audio signals. Not only that, it supports resolutions up to 4K, making it a versatile and must-have port for any multimedia setup. Trust me, you’ll want to make sure your devices have this port for the best possible audio and visual experience.
DisplayPort:
- DisplayPort is an essential technology for anyone looking for the best in display performance. Its capability to support high resolutions and refresh rates makes it a top choice for high-performance monitors and graphics cards. Additionally, the ability to daisy-chain multiple monitors together provides a convenient and efficient way to set up a multi-monitor display. With all these features, it’s clear that DisplayPort is a crucial component for anyone seeking top-quality display.
- VGA (Video Graphics Array):
- VGA, or Video Graphics Array, is a tried and true technology that has been used for video display for years. It may operate on an analog signal, but that doesn’t mean it can’t still deliver a reliable and functional video output. In fact, many devices still use VGA and it continues to serve its purpose effectively. So don’t let its age fool you, VGA is still a solid option for video display.
- DVI (Digital Visual Interface):
- DVI is an older type of connection, but don’t let that fool you – it still offers better quality than VGA. Even though it’s not as common in modern devices, it’s definitely worth considering for its superior visual performance. Trust me, you won’t regret choosing DVI for your visual needs.
- USB-C / Thunderbolt:
- USB-C/Thunderbolt is the latest and greatest technology for your laptops and devices. This amazing port can handle video, audio, data, and power all at the same time, making it the ultimate solution for all your connectivity needs. With the ability to support high resolutions and connect multiple monitors with just one cable, USB-C/Thunderbolt is the future of connectivity. Don’t miss out on the convenience and power of this advanced technology – make the switch today and elevate your connectivity experience.
Identifying Ports:
I urge you to take a moment to carefully examine the back of your computer and monitors in order to identify the available ports. If you’re unsure about the types of ports, I recommend referring to the manuals that came with your computer and monitors. It is crucial to know what ports you have available so that you can easily connect additional devices as needed. This knowledge will save you time and frustration in the long run.
Graphics Card Capabilities:
When it comes to maximizing your computer setup, your graphics card plays a crucial role. It’s important to know how many monitors your graphics card can support so you can make the most of your display setup. Whether you have an integrated or dedicated graphics card, it’s essential to check the specifications to ensure you’re getting the most out of your setup. You can find this information in your computer’s manual, on the graphics card manufacturer’s website, or by checking the specifications in your operating system. Don’t limit yourself – know the capabilities of your graphics card and unlock its full potential.
III. Types of Connections-How to connect two monitors to one computer
When it comes to connecting your computer to your monitor, the options may seem overwhelming. But fear not, as we have a detailed look at each type of connection available, so you can choose the one that best suits your needs. Let’s break it down and make it easy for you to decide the best way to connect your devices. Don’t worry, we’ve got you covered!
HDMI:
HDMI is the absolute best choice for connectivity, no doubt about it. It’s practically universal and incredibly easy to use, so setting it up is a piece of cake. And let’s not forget, it’s not just for video – it handles audio too, making it the ultimate all-in-one solution. Whether you’re using it at home or in the office, HDMI is the top pick for monitors. Just be sure to get cables that can handle the resolution you want, and you’re all set!
DisplayPort:
DisplayPort is the clear choice for high-performance monitors. With its daisy-chaining capability, you can easily connect multiple monitors using just one DisplayPort output. In addition, it often supports higher resolutions and refresh rates compared to HDMI. It’s important to be aware of version differences (DisplayPort 1.2 vs. 1.4) that can affect its capabilities, so be sure to check your devices’ specifications for compatibility. Don’t settle for less, make the smart choice and opt for DisplayPort for your monitor setup.
VGA:
VGA, although suitable for older monitors, is not the best choice due to its lower quality. The analog signal can lead to reduced image clarity, making it less than ideal for modern use. However, it can still be useful for basic tasks if digital connections are not available. I highly recommend upgrading to digital connections for a better visual experience.
DVI:
DVI cables are truly the best option for older setups. With options like DVI-D for digital and DVI-I for integrated support, you can’t go wrong. The image quality with DVI is superior to VGA, and even though it’s less common in new monitors, it’s the way to go for the best image quality in older setups. Make the upgrade to DVI and experience the difference for yourself!
USB-C / Thunderbolt:
USB-C/Thunderbolt is the best choice for newer devices, hands down. It can handle high-quality video, audio, and data, making it a versatile option for all your connectivity needs. And let’s not forget about Thunderbolt 3 and 4, which offer daisy-chaining capabilities and higher bandwidth, giving you even more flexibility and power. Just make sure that your USB-C port supports video output, as not all of them do. With USB-C/Thunderbolt, you’ll have all the connectivity options you need for your modern devices. Trust me, you won’t regret it.
Adapters and Converters:
When it comes to connecting your devices, adapters and converters are absolutely necessary. If your computer and monitor have different ports, you’ll definitely need adapters to make the connection work. Whether it’s HDMI to VGA, DisplayPort to HDMI, or USB-C to HDMI, there are plenty of options available to ensure compatibility between your devices. Just be sure to choose adapters that support the desired resolution and refresh rate for optimal performance. Don’t let different ports stand in the way of connecting your devices – adapters are the solution to ensure seamless compatibility.
IV. Setting Up Your Monitors
Step-by-Step Guide:
- Power Down:
- It is absolutely crucial to follow the correct steps when setting up your monitors. The very first step is to power down your computer in order to establish a safe and secure connection for the monitors. This simple action will prevent any potential issues and guarantee a seamless setup process. Trust me, taking this precaution will save you a lot of hassle in the long run.
- Connect Cables:
- When setting up your computer with multiple monitors, it’s crucial to connect the right cables. You need to identify the appropriate cables for your computer’s ports and connect one end to the computer and the other end to the monitor. Repeat this process for the second monitor. And if the ports don’t match, don’t worry! You can simply use adapters to make the connection. It’s a straightforward and easy process that will greatly improve your computer setup and productivity. So, don’t hesitate to make the necessary connections and enjoy the benefits of a multi-monitor setup!
- Power On:
- Let’s get things rolling! Power up that computer and monitors and let’s get this show on the road. It’s time to make things happen!
- Initial Detection:
- You deserve to have complete control over your display setup. Your operating system should seamlessly detect any connected monitors, but in case it doesn’t, you can easily access the display settings to manually detect and configure them. This ensures that you have full control over your display setup and can optimize it according to your needs. Don’t settle for anything less than the perfect display configuration for your work or entertainment needs. Take charge and make sure your monitors are working exactly as you want them to.
V. Configuring Display Settings
Great! Now that your monitors are connected, it’s time to make sure your display settings are configured just the way you like them. Every operating system has its own way of doing this, so let’s dive in and explore how to do it on different platforms. You’ll be amazed at how much more enjoyable and productive your computing experience will be once you have your display settings just right. Let’s get started!
Windows:
- Access Settings:
- You absolutely must experience the seamless and hassle-free process of accessing your display settings. All it takes is a quick right-click on your desktop and a simple selection of “Display settings” from the context menu. It’s as easy as that to personalize and fine-tune your display to your liking. Give it a try and witness the immediate impact it can have on your overall user experience. You won’t regret it!
- Detect Monitors:
- Sure, I highly recommend taking a moment to go to the “Multiple displays” section and give the “Detect” button a click if you’re not seeing both monitors. It’s a quick and easy fix that could make a big difference in your setup. Trust me, it’s worth it!
- Arrange Displays:
- It is absolutely crucial to arrange your monitors in the settings window to correspond with your physical setup. This simple step will guarantee that your mouse can glide effortlessly between screens, ultimately enhancing your work or gaming experience. Don’t underestimate the significance of this step in maximizing your display setup!
- Adjust Settings:
- Choose the option “Extend these displays” to maximize your workspace and use both monitors as one seamless extended display. This will allow you to have more space to work and increase productivity. On the other hand, if you select “Duplicate these displays,” you can mirror the same content on both monitors. This can be useful for presentations or sharing the same information with multiple people at the same time. Both options have their own benefits, so choose the one that best suits your needs.
- Set Resolution and Orientation:
- Make sure to adjust the resolution and orientation of each monitor to get the best image quality possible. Click on each monitor and set the resolution to the recommended value. This simple step will guarantee that you have the best image quality for your specific needs.
macOS:
- Access System Preferences:
- MacOS provides a user-friendly interface for accessing system preferences. All you have to do is click on the Apple menu, select System Preferences, and then click on Displays. This simple process allows for effortless customization of display settings to fit your preferences. Give it a try and see just how easy it is to personalize your display!
- Detect Displays:
- Make sure you hold down the Option key on your keyboard and then click on the “Detect Displays” option if necessary. Doing this will allow your device to detect any additional displays that are connected. It’s an important step to ensure that your setup is working properly and that you’re getting the most out of your display capabilities. So don’t forget to take this extra moment to make sure everything is set up correctly.
- Arrange Displays:
- It is absolutely crucial to arrange your display icons to match your physical monitor setup. By dragging the menu bar to the primary display, you can easily access and organize your files, leading to a more efficient and effective work environment. Don’t underestimate the impact of a well-arranged display setup on your productivity!
- Adjust Settings:
- Please make sure to adjust your settings by selecting either “Extend” or “Mirror” displays in the Arrangement tab. Then, under the Display tab, set the resolution for each monitor to ensure the best viewing experience. It’s important to customize these settings to optimize your display and make the most of your technology.
- Set Resolution and Orientation:
- It’s crucial to personalize the resolution and orientation of each monitor to guarantee the best possible display. By customizing these settings, you can optimize the viewing experience and ensure that each monitor is set up to meet your specific needs. Don’t settle for a one-size-fits-all approach when it comes to display settings – take the time to tailor them to your preferences for the most enjoyable and efficient use of your monitors. Trust me, it’s worth the extra effort for a better overall experience!
Linux:
- Access Display Settings:
- Linux offers a user-friendly interface for adjusting your display settings. With just a few clicks, you can easily customize your display to your liking. This level of control and flexibility is one of the many reasons why Linux is a great choice for users who value personalization and customization. So, if you want to tailor your display settings to suit your preferences and needs, Linux has got you covered.
- Detect Monitors:
- It is crucial to ensure that all connected monitors are properly detected. If they are not automatically recognized, it is as simple as clicking on “Detect Displays” to ensure that they are set up for use. This will ensure a seamless and efficient experience when using multiple monitors.
- Arrange Displays:
- Make sure that your physical setup matches the displays in the display settings window by dragging and arranging them accordingly. This is crucial for optimizing your display settings and ensuring the best user experience. Take the time to align your setup with the settings to make the most out of your display.
- Adjust Settings:
- You absolutely must take the time to adjust the settings on each monitor to tailor the resolution and orientation to your liking. By utilizing the “Join Displays” or a similar option, you can seamlessly extend your workspace across multiple monitors, resulting in a significant enhancement of productivity and a more immersive and efficient work environment. Trust me, it will make a world of difference!
VI. Troubleshooting Common Issues
Don’t worry! Even if you encounter some issues after following the steps above, we have a solution for common problems. You’re not alone, and we’re here to help you through any challenges you may face. Keep going and don’t give up!
Monitor Not Detected:
I understand how frustrating it can be when your monitor isn’t being detected, but don’t worry, there are some simple steps you can take to troubleshoot the issue. First, make sure all your cables are securely connected. Check if the monitor is powered on and try using a different cable or port if necessary. It’s also a good idea to update your graphics card drivers, as this can sometimes resolve the issue. With these steps, you’ll be back up and running in no time. Don’t give up, you’ve got this!
Incorrect Resolution:
Sure thing! Adjusting the resolution in your display settings will greatly enhance your viewing experience. It’s important to make sure your monitor supports the desired resolution and check for any available graphics driver updates to optimize your display quality. Trust me, you’ll notice a big difference once you make these adjustments. Go ahead and give it a try!
Display Flickering:
You absolutely need to check the refresh rate in your display settings to guarantee a smooth and flicker-free viewing experience. It’s crucial to make sure that the cable connecting your display is of top-notch quality and properly connected to avoid any flickering issues. And don’t overlook the importance of updating your graphics card drivers to maintain optimal performance and prevent any display flickering.
Specific Problems:
When dealing with issues related to your monitors or graphics card, it’s crucial to consult the user manuals or reach out to the manufacturer for support. Utilizing online forums and support communities can also provide valuable insights and solutions to similar problems. Don’t hesitate to seek help and explore all available resources to effectively resolve your technical issues.
VII. Enhancing Your Dual Monitor Setup
Congratulations on getting your dual monitor setup up and running! Now it’s time to take it to the next level and really make the most of it. Here are some tips to enhance your experience and maximize the potential of your dual monitor setup. Whether you’re a gamer, a professional, or just a multitasking enthusiast, these tips will help you get the most out of your dual monitors. Let’s take your setup to the next level!
Cable Management:
It’s crucial to keep your workspace neat and organized, and one easy way to do that is by using cable ties, clips, or sleeves to keep your cables in order. This small change can have a huge impact on the look and efficiency of your workspace. Don’t let tangled cables disrupt your productivity – take charge of your cable management now!
Monitor Stands/Mounts:
Investing in adjustable monitor stands or wall mounts is a smart move to enhance ergonomics and maximize desk space. Be sure to select stands or mounts that are compatible with the VESA mounting patterns of your monitors for a seamless fit. It’s a small investment that can have a huge impact on your workspace. Trust me, you won’t regret it!
Software Tools:
If you want to boost your productivity and get the most out of your computer setup, you need to check out software tools that are specifically designed to enhance your workflow. Tools like DisplayFusion, Ultramon, and NVIDIA’s nView offer a wide range of features to help you manage multiple monitors, create virtual desktops, and customize hotkeys. With these tools, you can take your productivity to the next level and make multitasking a breeze. Don’t miss out on the chance to optimize your computer setup and streamline your work process. Give these software tools a try today and see the difference for yourself!
VIII. Conclusion
In conclusion, it’s clear that connecting two monitors to your computer can greatly improve your experience, whether it’s for work or play. By following the steps in this guide, you can ensure a seamless and efficient setup. With the right hardware, connections, and configurations, you’ll be able to fully take advantage of the benefits of a dual monitor setup. So why wait? Take your computer experience to the next level with a dual monitor setup today.
Also read How to Connect Two Monitors to One Computer with HDMI ?
- Related Articles:
- Looking to set up a dual monitor system for increased productivity? Look no further! Our articles on the best monitors for dual setup in 2024, top productivity tips for dual monitors, and how to choose the right monitor stand will provide you with all the information you need to optimize your workspace. Don’t miss out on the opportunity to enhance your productivity and efficiency with a dual monitor setup. Check out our articles now!
- FAQ:
- What if my monitor has only VGA and my computer only HDMI?
- Don’t worry if you’re dealing with a monitor that only has VGA and a computer that only has HDMI. You can easily solve this problem by using an HDMI to VGA adapter. Just be sure to choose an adapter that supports the resolution you want, and you’ll be able to connect your computer to the monitor without any trouble. It’s a simple and effective solution to ensure compatibility between your devices.
- How do I fix my flickering screen?
- If you’re tired of dealing with a flickering screen, follow these simple steps to fix the problem once and for all. Start by checking and adjusting the refresh rate, then make sure all cables are securely connected. If the issue persists, try using different ports or cables to see if that resolves the problem. You deserve a clear and stable screen, so take action and get it fixed today!
- Can I use different types of connections for each monitor?
- Of course! You have the freedom to choose from a variety of connection types for each monitor. As long as your graphics card can handle it, you can mix and match connections to create a setup that works best for you. This flexibility allows you to customize your setup to meet your specific preferences and needs.
X. About the Author
Hey there! If you’re in need of some top-notch IT support and technology writing, then you need to meet Sarah. With over ten years of experience, she’s the real deal when it comes to breaking down complex tech topics and streamlining computing environments for individuals and businesses. And when she’s not busy writing or solving tech problems, she’s staying on top of the latest tech and gaming developments. Connect with Sarah on LinkedIn or check out her blog for some valuable tech insights and guides. Trust me, you won’t regret it!